Electronic voting for city councils in 3 easy steps
Why switching to an electronic voting system is a must in every local government’s council room?
All around the world, we see more and more city councils embracing digitalizing, and more specifically electronic voting in city council meetings. This is good thing for various reasons.
2 good reasons to integrate electronic voting in your city council’s conferencing system
What about something as simple as clarity? Many councils have issues with hard-to-hear spoken votes, or the pressure of having to quickly count raised hands. Human error is always near, especially when multiple people are speaking at the same time or the hand-raising session gets a bit frantic. Electronic voting puts a stop to all of this hassle.
Another very valid reason to switch to electronic voting is record keeping and transparency. The fact of the matter is, that more eyeballs than ever are on city council meetings. The public nowadays demands easy access to clear and concise information. And rightfully so. Well, things do not get any clearer than an automatic voting report, recorded and generated by a digital system.
…and one even better reason: it’s easier than you may think
The best reason to adopt electronic voting may well be that… it’s easy. With Televic’s Confero 360 conferencing software, the entire electronic voting process is literally built into the delegate microphone system. Once the system is in place, an electronic voting session happens in 3 really simple steps.
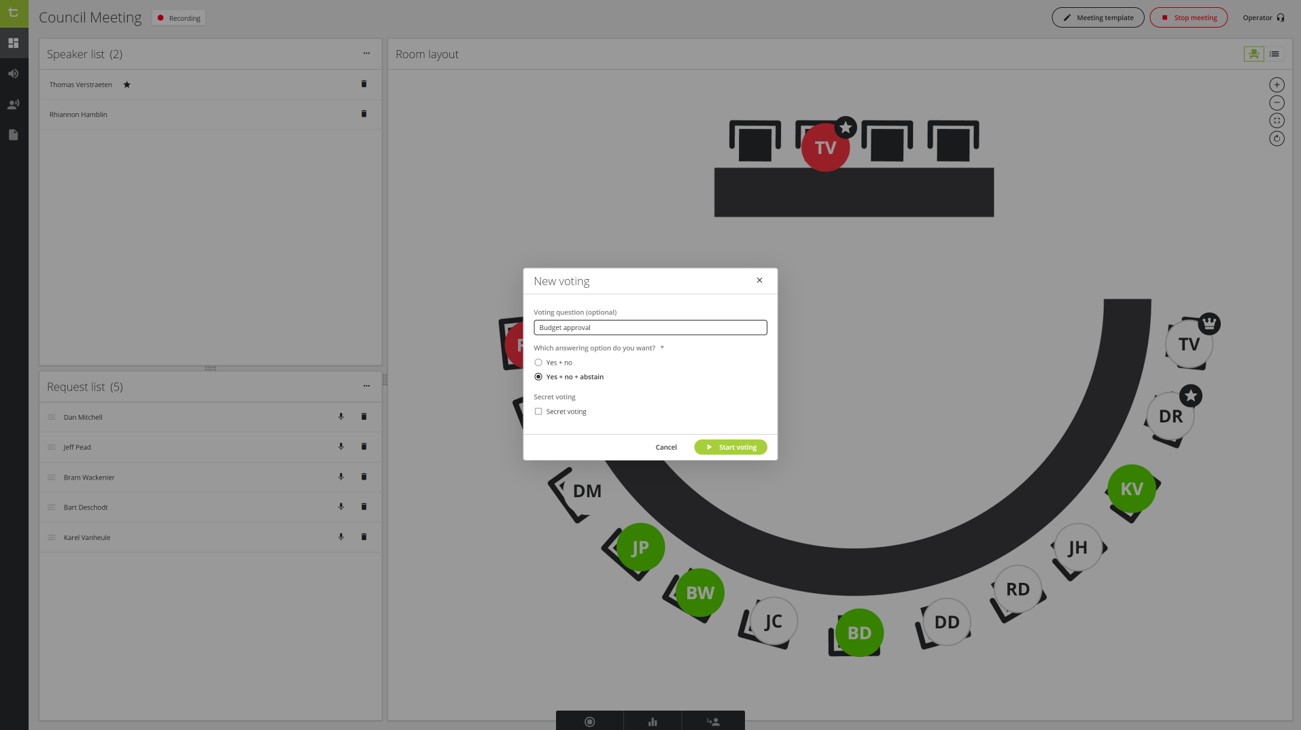
Step 1: initiate a vote
Whenever a voting item comes up in the council meeting agenda, Instead of calling for a raise of hands or a spoken vote, the clerk will initiate an electronic vote. All he has to do, is hover at the bottom of the meeting management module screen, and select “Start Vote”. The box that is now automatically activated, enables the clerk to type the voting question. He selects the ‘Yes/No’ or ‘Yes/No/Abstain’ option and clicks ‘Start Vote’.
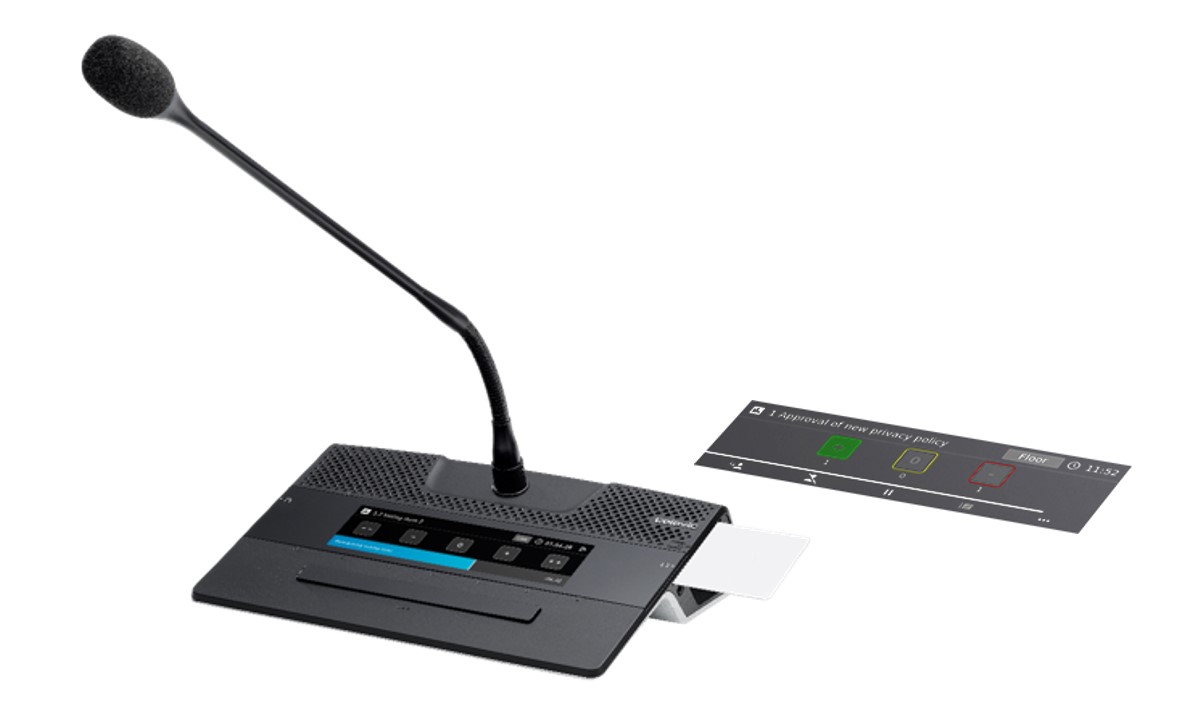
Step 2: voting with the click of a button
Each commissioner can now simply press a button directly on their delegate microphone to indicate how they choose to vote. For instance, on the Confidea FLEX microphone, the voting takes place using simple ‘Yes, No and Abstain’ buttons on the integrated touchscreen. By the way, this same screen can accommodate features such as displaying the delegate’s name, showing speech timers, agenda items, and much more.
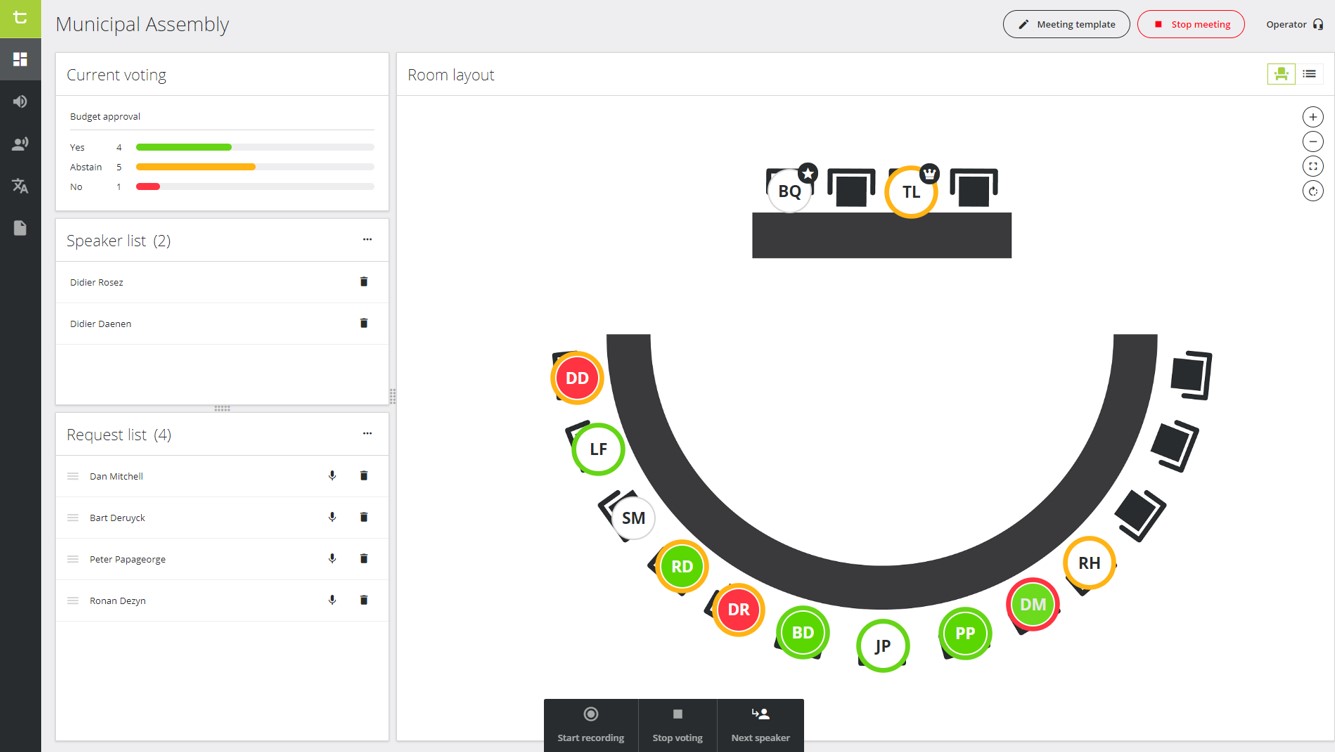
Step 3: Real-time voting results and reports
Voting results are displayed in real time during a meeting. If you look at the image below, you can see that the outer ring on each circle indicates the way each person has voted (the inner dot is whether their mic is active, or requesting to speak). Votes can by anonymous or public, and everything is on the record. If you select “Secret Vote” you won’t see an indication of individual voting selection.
At the end of the meeting, the clerk can easily export a voting report summary to be attached as an addendum to the minutes.